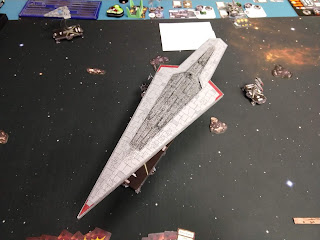
Dr. Piett and the Goz...or How I Learned to Love the SSD
"Aboard the Executor, being useful is the only way to survive."
―Maximillian Veers
Hello fellow Admirals. This is the first in, hopefully, many posts on practical fleet building and developing competitive lists. I plan to talk about my experiences trying to design lists and trying non-meta stuff to help folks figure out their own strategies.
With that said, there is no better ship to start with than the biggest one in the game: the SSD. I had spent most of 2019 practicing and tweaking a Sloane ISD list for NOVA Open (US Nationals), and after taking it to a 7th place finish, I was ready for a list that wasn't so squadron heavy. I bought the SSD as soon as it was released; mainly thinking it would be for more casual play and that I would likely be taking dual ISDs or MC75s to regionals. However, once I got this beautiful model on the table and learned its tactics, I started taking a look at how you can make it competitive.
Choosing the Flagship: The first decision was to decide which version I wanted to build around. I had seen several folks bring the SSD to Nationals (but only facing it once in the first round of Swiss), already capitalizing on the dual turbolaser slots and Ravager title to maximize dice. However, I wanted to see how the Command SSD would operate in a fleet, so my first list was a SSD with an Interdoctor (Interdictor equipped to repair and protect other ships). Although the list looked good on paper (One offensive ship and one defensive ship) the Interdictor just couldn't keep up with the damage and my opponents typically got half-points each time.
Selecting an Admiral: Switching to the assault version, I focused on trying to balance offense with defense, knowing that I could only fit support or squadrons in with the SSD. I went with Piett over JJ (the two most popular SSD commanders) to get the "double dial" effect that would complement the two token-tossing Gozantis filling out my fleet. There is no doubt that JJ is extremely powerful on the SSD, but I wanted flexibility to do two commands in a turn and counter slicer/boarding teams that I would be unlikely to escape from.
Upgrades: Next was the process of filling out the upgrades:
- Crew: Three crew slots seems like a lot at first, but they can fill up quickly. The key to these spots is to select crew that mitigate a potential weakness or boost a particular ability. In this case, I need to protect against devastating attacks and hit more harder.
- Damage Control Officer: I've seen some bold Admirals not take this on an SSD, but it has saved me a couple times. An SSD needs to absorb a large hit by reducing the damage; either using a brace or redirecting. ACMs, APTs, HIEs, and really most critical effects can drop shields faster than you can move or repair them.
- Captain Bruson: Do yourself a favor and just glue this officer to your SSD. With the largest base in the game, there is only the rarest occasion that you won't be 1-2 from an obstacle. If I could take only one upgrade on the SSD, this would be it.
- Intel Officer: Nothing like rolling a devastating attack out of your front arc, with an accuracy to stop the brace, and your opponent uses ECMs to continue merrily along their way. IO ensures that you give them very hard choices when they use that brace, and makes your weaker arcs hit harder if they don't have it. Just be sure to use IO's ability, before you add any dice or reroll.
- Turbolaser: Many SSD players stand by the H9/QLT combo to get that red accuracy, add another accuracy, and if they don't need them, reroll to fish for the double hits. I went a slightly different route to force some hard choices for my opponents and work with my other upgrades.
- Quad Battery Turrets: For the most part, my SSD goes speed 1, while my opponents try to fly by my front arc at top speed (and long distance) to attack my weaker sides and rear. QBTs allow me to add that extra blue die to all my attacks that I can use for the result or spend for leading shots to reroll those under performing reds.
- XI7s: While my IO is focused on getting rid of my opponent's brace, the XI7s make their redirects near useless. I found in most of my games, my opponents groan when they saw this upgrade in my list. Also, it sometime made my opponents fly in non-optimal ways to protect hull zones that had no shields.
- Ion Cannons: Leading Shots is the card to glue here. The SSD has a lot of red dice that don't often roll the way you want. If you don't have Vader, you need that reroll. What about the other slot?
- Ion Cannon Batteries: This card was patiently waiting in my binder for just this moment. It is the ultimate win-win card on the SSD. People like to bank tokens, especially navigate, for later rounds. ICBs can remove that token and force them to rely solely on their command stack. Once the tokens are stripped, you can drop a shield before the rest of your attack comes in. Combined with XI7s, you move into hull damage very quickly if your opponent is riding around token naked.
- Weapons team: Gunnery Teams. That is all.
- Offensive Retrofit: Reserve Hangar Deck: Sloane is the bane of SSDs. I like hiding behind all those defense tokens. Sloane likes to remove them. SSDs need to calculate in some sort of squadron cover or start praying. For me, I use two plain Jane Interceptor squads to harass and hopefully damage incoming squadrons. For three points, one can come back as a "zombie" and try to hold off those incoming squadrons.
- Title: Ravager: Who doesn't like more dice?
Support: After all that I still had some fleet points left. I thought about a Vader/Raider to harass a target ship, but felt that two Gozantis with Comms Net help keep Piett happy with lots of tokens and padded my activation count. One Gozanti had Reserve Hangar Deck to make my two Interceptors a bit more annoying and the other had everyone's friend, Hondo. Hondo is insurance that I get the token I need most if I have to activate the SSD before the flotillas. Flotillas are also useful for blocking up attack lanes or dropping a shield or two on a target ship/squadron before the SSD attacks.
So there it is, my thought process in building my SSD list. Hopefully, this has helped with your construction of this awesome ship or maybe some insight on how to use some of these combos on your ship of choice. In part two of this article, I will write up my battle report on taking this SSD build to a Prime Championship, going undefeated, but losing out on MoV for the top spot.


Comments
Post a Comment